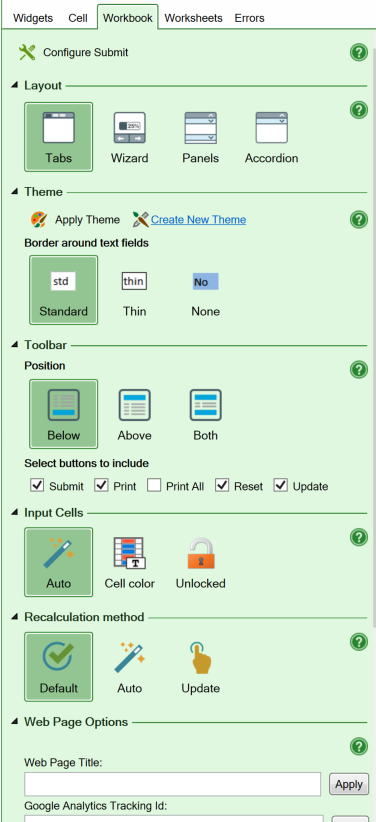
The Workbook tab contains settings that control the conversion of an Excel spreadsheet to a web page.
The Workbook tab of the task pane contains settings for the converted web page. These settings are saved with the spreadsheet.
The contents of the Workbook tab varies slightly between flavors.
This page describes the new layout of the Workbook tab for SpreadsheetConverter version 9 and later. If you are using an older version, please read the help page for version 8.
If you design an electronic form using an Excel spreadsheet, SpreadsheetConverter can convert it to a smart web form with a free, turnkey solution for the handling of the submitted forms. When a user presses the Submit button in the form, the form’s contents are sent to one of our servers, which converts the form fields into an e-mail and sends it directly to you. The basic functionality is free, giving you immediate access to all the forms submitted by your users.
For a nicer layout, we invite you to a free trial of the Advanced Submit Service. This is a fee-based service that not only makes the e-mail with the form data much easier to read, but also saves all submitted form data on our servers. Whenever you want, you can download this data in one of several convenient file formats.
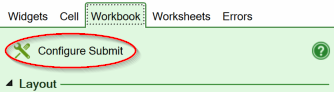
Click on the Configure Submit link to control how electronic forms are to be handled when submitted.
Read more about how to configure a web form’s Submit options.
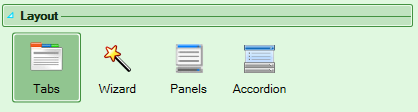
You select what worksheets in your workbook to show or hide on the Worksheets tab. If you have two or more visible worksheets, you need to specify how the user switches between the sheets.
SpreadsheetConverter has five different ways to handle multi-sheet workbooks:
Read more about multi-section forms.
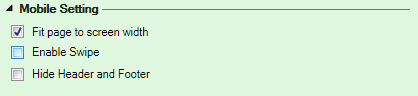
When you create a spreadsheet, you don’t know the exact width of the screen for each user. If you tick the Fit page to screen width checkbox, the web page will always zoom to fill the screen width of any device, both in portrait and landscape orientation. If the checkbox is unticked, a narrow spreadsheet will leave empty screen space to the right, and a wide spreadsheet will require horizontal scrolling.
If you want full control, don’t tick this checkbox, then follow the instructions on how to optimize the Excel column width to fit particular screen widths.
The Hide Header and Footer option lets you display just the body part of the spreadsheet in the web page, i.e. without the sheet title, so that it integrates better when you package it with a native app.
The Enable Swipe option is useful when your calculator or form has more than one sheet and it is converted to a web page with the Wizard layout. When Enable Swipe is checked, the user can move between the steps in the wizard by swiping left for Next or right for Previous.
The Mobile settings are only available for the iPhone/Android flavor.
A theme provides layout settings that can be used to tailor the visual appearance of more than one web page. You create a theme with Theme Designer, then import it into your SpreadsheetConverter installation and apply it to one or more spreadsheets before converting them to web pages.
Themes and the Theme Designer are not available for the iPhone/Android flavor.
The Create New Theme link opens the Theme Designer in your default web browser. The Apply Theme link lets you select between the available themes, install a new theme if necessary, then apply it to the current spreadsheet.
Read more about themes and ThemeDesigner.

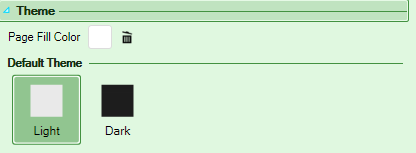
The Page Fill Color is used for the entire background of the converted web page, also in places where there is no corresponding color setting in Excel.
Read more about the Page fill color.
The Default theme setting allows you to set an overall layout to your web page. There are two settings, Light and Dark.
The Page Fill Color and the Default Theme setting are only available for the iPhone/Android flavor.
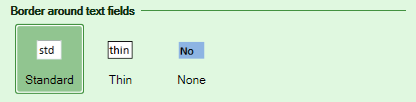
By default, the text input fields in your web calculators and forms will have a special border that visually indicates that they are open for user input. Output text fields do not have a border unless you have set the corresponding Border property for the cell in Excel.
You can use the Borders around text fields setting to select a thinner border or to remove the border completely. If you remove the border, it will be difficult for the user to see what fields that can be used to enter data, and empty input fields will be invisible.
This option is not available for the iPhone/Android flavor.
SpreadsheetConverter inserts a toolbar in the converted web page. The toolbar contains the action buttons that allow the user to Update a calculator, Submit a form, Print a page or Reset all field contents to their default values.
The Toolbar position setting allows you to place the toolbar Below the spreadsheet, Above the contents of the page, or Both. To completely remove the toolbar, unselect all the action buttons.
The toolbar and this option are not available for the iPhone/Android flavor, which always places the action buttons in the Side Menu.
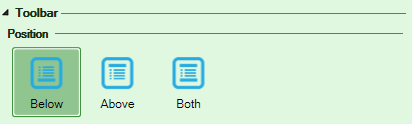
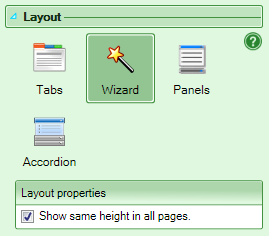
A bottom toolbar normally appears directly below the last content on each page. When using a Wizard layout, the Show same height in all pages setting ensures that the bottom toolbar doesn’t move up and down between wizard pages of different length.
Use the checkboxes under Select buttons to select which of the action buttons you want to include in the toolbar or Side menu.
To completely remove the toolbar, unselect all the action buttons.
You may modify or translate the text for each button using Options > Customize Texts.
In the iPhone/Android flavor, the buttons are located in the Side menu via the “hamburger” button in the top left of the screen. In the other flavors, the buttons are located on the toolbar. Using Action button widgets, action buttons can also be placed almost anywhere on the web page.
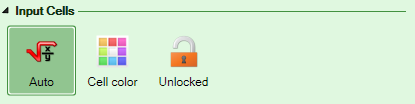
When converting a spreadsheet to a web page, SpreadsheetConverter must determine what cells to open for data entry. All other cells are locked in order to protect formulas, captions and constants, and to give the spreadsheet the overall appearance of a web page.
When you design a web form, you may need to manually define certain form fields as input fields to ensure that they will be open for user input in the converted web page. You do this by inserting widgets, using coloring or by unlocking the cells.
Read more about how to open cells for user input.
When the user changes anything on the web page, all other cells are normally recalculated automatically, just like with Excel.
For very large spreadsheets, we turn automatic recalculation off to make the web page more responsive – just press an Update button to recalculate the sheet. You can enforce automatic or manual recalculation with the Recalculation Method setting.
This section allows you to assign a few properties that are valid for the entire web page, regardless of what tab or panel the user is on. Always remember to click Apply if you change any of these settings – also if you want to remove a setting by emptying the field.
You should assign a title for each web page you create. The title appears on the tab for the web page in the web browser.
![]()
With many tabs open, you only see the first 15 characters or so of the title. You should put the most distinguishing information in the beginning.
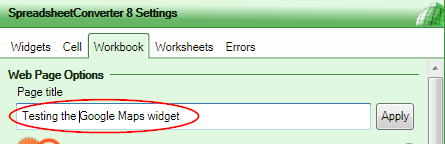
If you don’t specify a page title, the file name is used as the page title.
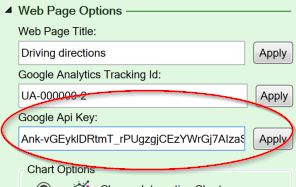
If you use Google Analytics to track your website visitors, please supply your Google Analytics Tracking ID to obtain visitor tracking also for the web pages generated by SpreadsheetConverter. Read more about visitor and conversion tracking.
Google requires you to have an API key to show maps on your website. The API key identifies you as a user of the free map service and allows Google to charge you if you use the service above the free allowance. You can use the same API key for all your Google maps. If you don’t already have one, you can get an API key for free from Google.
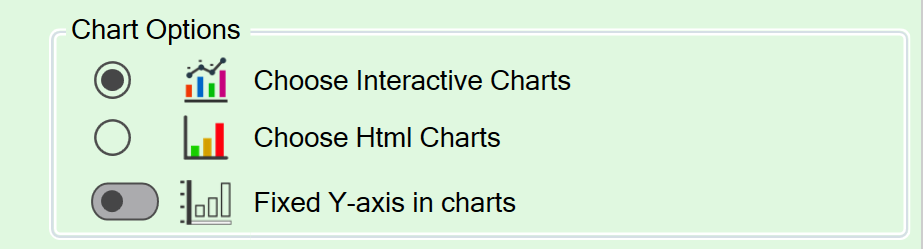
Use the Chart Setting if you want the charts in your web pages to be generated with the old HTML engine. Interactive Charts provide lots of added functionality.
Uncheck the Fixed chart Y-Axis setting to automatically adapt the min and max values of the Y axis in charts to the values.
With Real-time Sync, two or more users can share the same web form or calculator, entering data simultaneously and seeing each other’s changes live on the screen. If you wish to disable Real-time Sync for a calculating web page or web form, untick the Enable Real-time Sync checkbox and convert the spreadsheet again.
Read more about Real-time Sync in the HTML flavor.
Read more about Real-time Sync in the iPhone/Android flavor.
Web browsers provide a storage feature where websites can save data for later re-use. We use this permanent Browser storage in each of your users’ web browser to save the most recently used field contents for all the web forms the user has visited. If the user opens the same form again, it opens with the most recent values already entered in each field, which can save the user a lot of time. Read more about autosave for forms.
To reset the form fields to their default values, the user can press the Reset button in the toolbar or Side Menu.
If you wish to disable the use of Browser storage for one of your calculators or forms, untick the Enable Browser Storage checkbox and convert the spreadsheet again.
Disabling Browser storage will disable the autosave feature for all form fields, and will also disable the ability to use Offline Forms.
Read more about Browser storage.
If you provide data for lookup operations or dropdown menus in spreadsheet cells, we automatically hide these cell areas on the web page if you tick the Hide lookup range checkbox.
![]()
The Enable debug mode conversion setting is mostly used by our developers to obtain more information about a conversion error. It also adds a browser storage toolbar to the converted web page, so that we can get a better look at what’s going on within the browser.