Use widgets in your spreadsheet to improve the functionality and appearance of the converted web page. This help page introduces you to widgets and their common features.
SpreadsheetConverter provides an extensive selection of graphical widgets that makes your web page more appealing and easier to use. Use pre-formatted text fields, dropdown lists and calendars to improve the quality of the input data. Use Google maps and dynamically selected images to show your website visitors where you are, and what it looks like.
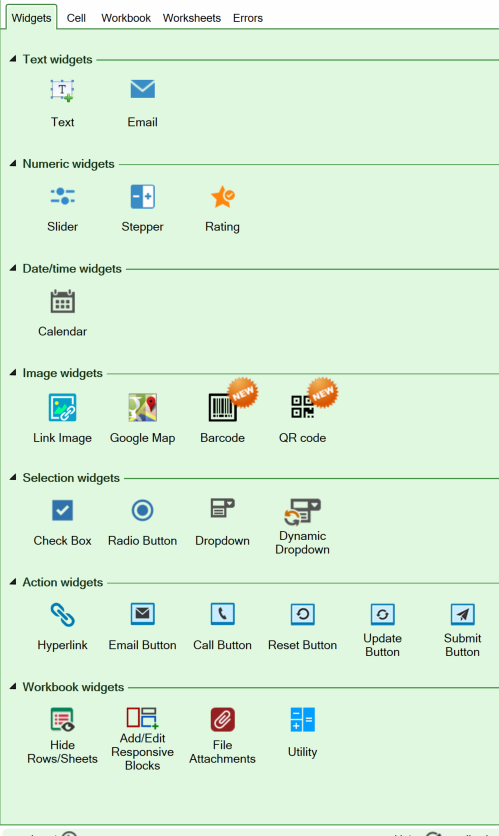
Widgets are inserted in the spreadsheet from the Widgets tab of the SpreadsheetConverter task pane in Excel. Select the cell where you want to insert the widget; then select the type of widget from the task pane. An options dialog appears, in which you can specify the detailed settings for the widget.
Most widgets are fully visible only in the web environment, even though you manage them in an Excel spreadsheet. To review the visual appearance of a web page containing widgets, you must convert your spreadsheet for the web and verify the result in a web browser.
In general, spreadsheets have a strict user interface. Often, it’s just letters and numbers arranged in rows and columns. When spreadsheets like these are converted to web pages, they look dreadful (we really should call them dreadsheets).
SpreadsheetConverter re-uses any existing graphical elements already present in your spreadsheets. An input field containing true/false values automatically becomes a checkbox, and a dropdown list created with Data > Validation > List becomes a dropdown list also in the converted web page.
To help you create a more appealing user interface, we took a step further and created a toolbox of user interface widgets that makes it much easier to use your calculator or web form:
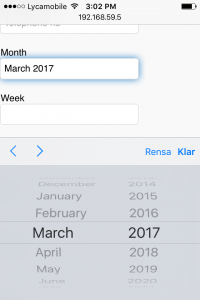
When using a mobile device, it can sometimes be difficult to enter data with proper formatting. Many mobile devices offer optimized keyboards for special data types, e.g. a numeric keypad. Some browsers offer data entry templates like date pickers, and even provide syntax validation.
The Text widget can request that the user’s web browser provides additional assistance when entering certain types of input. Your mobile users will be grateful for this help.
A word of caution, though: Although we can request this assistance from the browser, we cannot guarantee that the browser properly supports all input types, or that your users appreciate the help the browser is trying to provide. As an example, the full syntax for an e-mail address is very complicated and you can expect poorly coded web browsers to reject unusual but formally correct e-mail addresses such as john.smith(comment)@example.com or john.smith@[IPv6:2001:db8::1] while cheerfully approving obviously incorrect e-mail addresses such as john.smith.@example.com.
Users don’t like having correct input data flagged as incorrect by poorly tested web browsers. If possible, please test the advanced input types carefully before you implement them.
The Widgets tab of the task pane contains all the widgets available in your flavor of SpreadsheetConverter. If you have a license for more than one flavor, always remember to select the flavor you will convert with before you start adding or editing widgets. That way you get the widgets and settings that are appropriate for the flavor you will be using when you convert the spreadsheet to a web page.
You can open the Widgets tab using the Insert Widget shortcut in the ribbon.
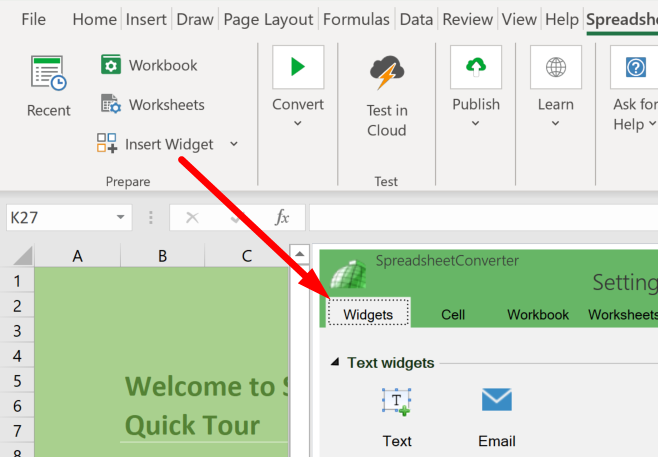
To insert a widget in a cell. select the cell where you want the widget to appear, then click on the widget’s icon on the Widgets tab in the task pane. A settings window appears to let you set the options for the widget you have selected, e.g.:
If you later need to modify these settings, just select the cell again and the settings page for the cell’s widget will appear in the task pane.
In version 10 or later, you can select multiple cells and insert the same type of widget in all selected cells with a single click. Regardless of how you insert widgets, you must still select them one by one to edit their properties.
Many of the widgets have an initial value by default. You can usually override the default initial value by inserting a value in the cell of the spreadsheet in which you placed the widget, so if you type Hello into a cell that contains a Text widget, the widget will initially have that value, too.
When the form is converted to a web page and opened in a web browser, most widgets are open for user input. The person that is using the form can override the initial values by changing the value of each widget.
We have tried to document the default value for every widget in their respective help pages. Here is a summary:
You can pre-fill many form fields from the link to the form. As an example, if the link to the form contains a language code (/form.htm?lang=sv), it will be preserved by the form if your form has a text field named lang, and it will be forwarded with the form when the form is submitted for processing.
Read more about filling form fields from the link.
Some widgets can be set as Required, meaning that the user of a web form must do something with the widget before the form can be submitted. Here are some of the actions required by the user for the most common widgets, when they are set as Required:
Developers use Hidden fields when they want a cell to be visible in the spreadsheet, but not in the converted web page. This allows them to provide information in the form without showing it in the form. As an example, if you use a cell to keep track of how long it took a user to fill in a form, you may want to hide this calculation. Even though a field is hidden, it’s contents are forwarded with the form when the form is submitted for processing. It is also common that developers use hidden form fields when pre-filling content from the link (see above),
For electronic forms, it is much easier to process the form if all input fields have names. You can name your cells in the widgets or give them cell names in Excel.
Widget names can start with numbers or an underscore, which is required when integrating with products like Salesforce.
You must assign a name to a cell if you want to pass data into it from the link to the form (see above).
Widgets use the same row/column layout as the rest of the spreadsheet. Many of the widgets may require more space than the default row height and column width in Excel.
As an example, if you use a dropdown list, a listbox or radio buttons to select a city or state name from a list, you probably want the widget to be wide enough for the longest name in the list. If you don’t, your flavor of SpreadsheetConverter must either wrap the longer names over more than one line (e.g. for radio buttons), or truncate the names after the allotted width (e.g. for dropdown lists).
If a widget is too big to fit within its cell’s height and width, the corresponding row and/or column may be widened automatically, depending on the web browser. This will probably harm the layout of your spreadsheet in an unpredictable way.
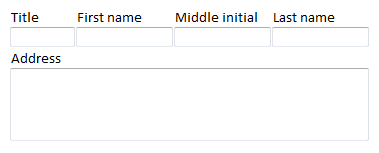
To make room for a large widget you can use Excel’s own Format Cells command to merge the cells in a cell area into one. First select all the adjacent cells you want to merge, then right-click somewhere in the area and select Format Cells…. On the Alignment tab, check the Merge cells option. This will create one big cell from all the cells you selected. Adjust the horizontal and vertical alignment if necessary.
In the example below, four columns and three rows, in total twelve cells, were merged for the Address multi-line text widget.
Cell widgets can be moved using Ctrl+X and then pasted into one or more other cells with Ctrl+V. You can also drag the cell and drop it in its new location.
Starting with version 10, cell so that any received data is easier to decode. When you cut-and-paste a widget into a single cell you just move it to a different location under the same name, but a copied widget always needs its own unique name, and whenever you paste a widget into more than one cell you should go through them and give them their own names.
Regardless of how you insert widgets, you must still select them one by one to edit their properties. Copying widgets by selecting a cell and pressing Enter or using AutoFill (Fill Down/Fill Right) is not supported. In version 9 and older, copying a cell in which a widget resides will only copy the cell’s contents, not the widget or its settings.
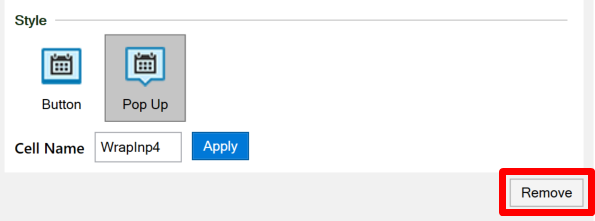
Most widgets have a Remove button. To remove a widget, select its cell and click Remove on the widget’s settings page.
If the task pane doesn’t open automatically, click on the Edit widget button in the SpreadsheetConverter ribbon.
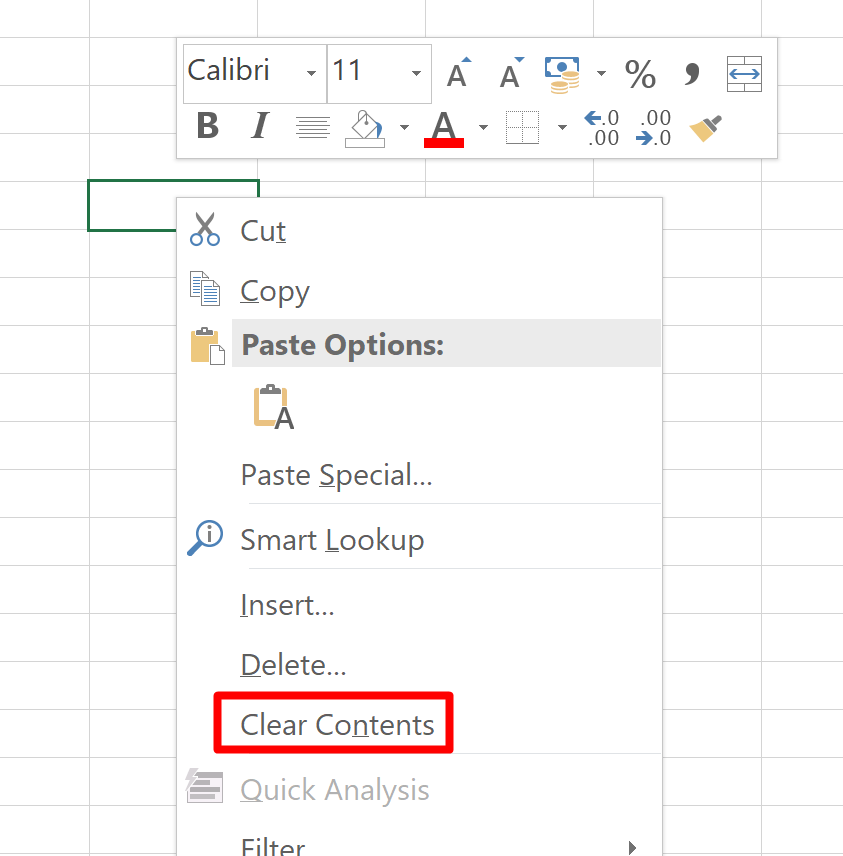
If the cell still isn’t empty, it may contain a default value or a comment. Right-click on the cell and select Clear Contents from the menu to clear the cell.
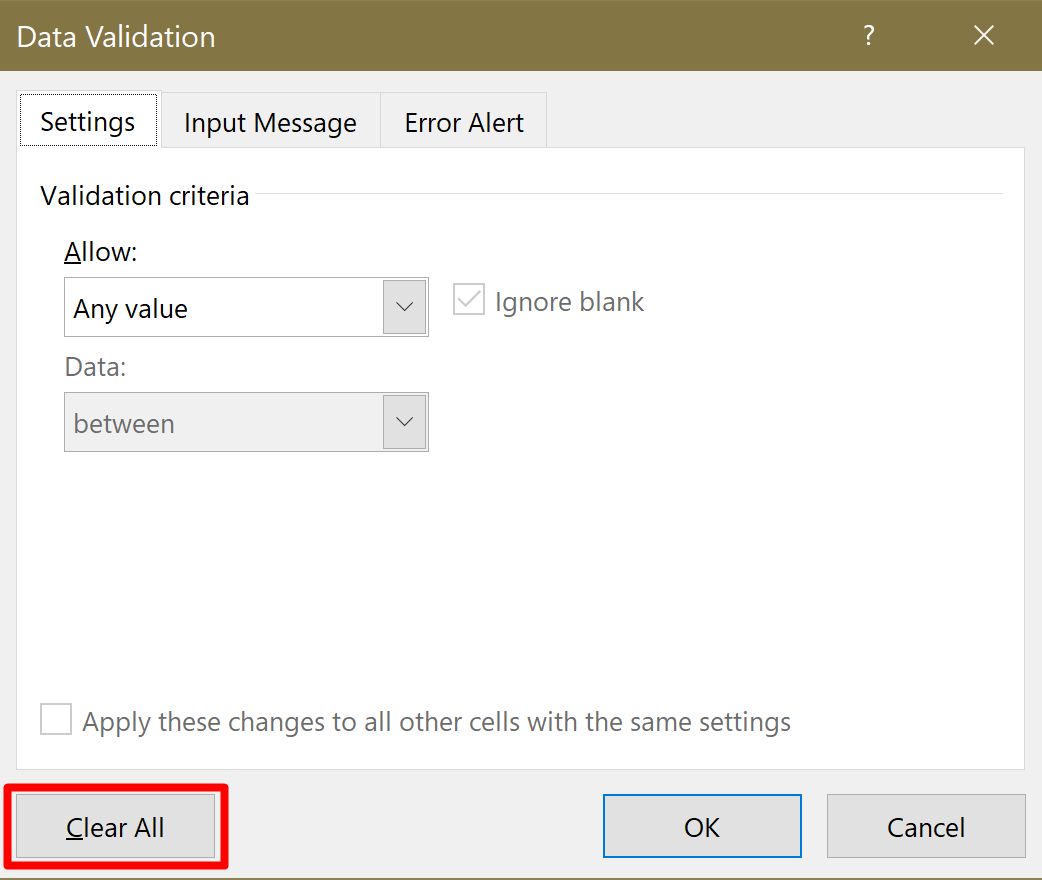
Finally, since we use Data Validation for some widgets, you may also have to go to Excel’s Data tab, locate the Data Validation settings and click Clear All and then click OK.
From version 10, most cell widgets can be inserted into two or more cells with the same operation. The Dropdown, Dynamic Dropdown and Radio widgets still need to be inserted one by one.
Widgets that use image placeholders like Link Image and Google Map may appear to support copying, but you are not copying the actual widget, only making a twin of its image placeholder. All these twin placeholders will always show identical content, since they are controlled by the same widget definition.
Detailed descriptions of each widget in the desktop flavors
Detailed descriptions of the widgets in the iPhone/Android flavor