The Barcode widget lets you generate a scannable barcode directly on the web page. The code can contain static information or information dynamically obtained by calculations or lookup operations in the spreadsheet.
Barcodes are one-dimensional, linear images containing information that typically identifies the object that carries the barcode. Most items in today’s shopping malls are marked with barcodes that are used to look up the price for each scanned item and add it to the total.
Barcodes are also used for tracking purposes. Many trackable object like vehicles, containers, pallets, bags and parcels carry a barcode that identifies the object and makes it easy to track it during transportation.
In your office, there may be barcodes mounted discreetly on the walls. If a passing guard scans these barcodes, it is easy to track the areas of the building that have been surveilled.
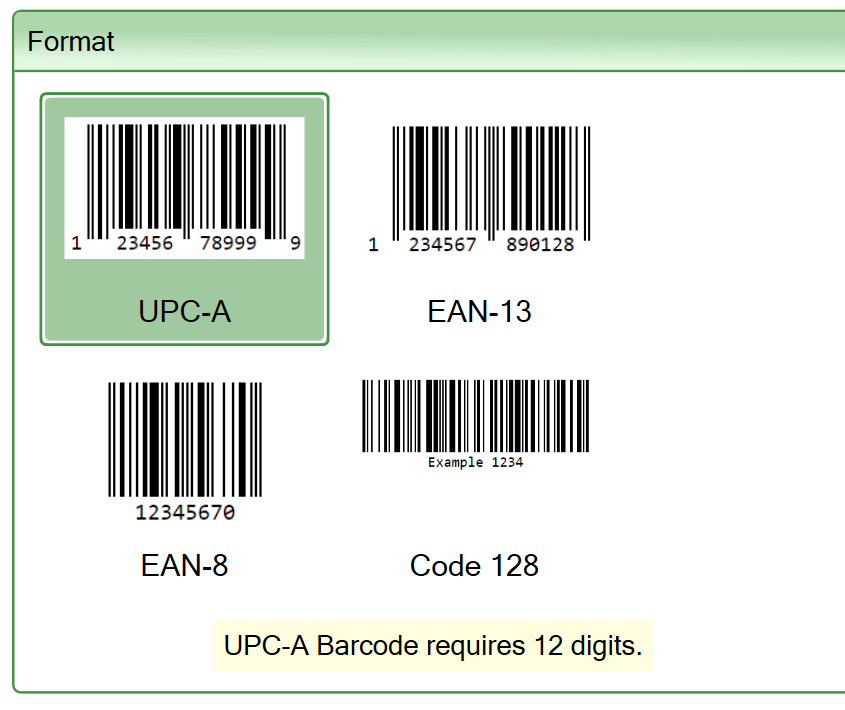
Barcodes can be scanned directly off the screen or printed on labels. In this first release, we support the following barcode formats:
The barcode widget uses two cells in the spreadsheet, one for the source data and one for the generated barcode. To create the widget, select the cell where you want the upper left-hand corner of the barcode. Open the task pane and select the Widgets tab. Scroll down to the Barcode widget. Click on the icon to insert the widget into the selected cell.
The widget can generate the barcode in different formats. Select the format you want in the Format section of the widget properties.
The content of the barcode will be taken from one of the cells in the spreadsheet. The source data cell can contain a static value or calculate the barcode contents with a formula. Static and calculated values can be concatenated.
To select the source data cell, click on the Select a cell button, click on the source data cell and then click OK. You can also type a cell reference into the text box and press OK.

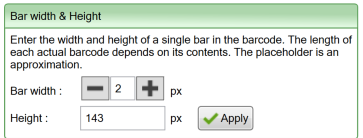
Set the width of each bar in the barcode in pixels. The wider the bars are, the longer the barcode will get. If the barcode is too long it may not fit the screen, or be difficult to scan.
Set the height of the barcode in pixels. If the barcode isn’t high enough, it may be difficult to scan.
When you insert a barcode widget in a cell, a placeholder appears in the same format as the barcode will have in the converted web page. Each actual barcode is generated starting at the upper left-hand corner of the placeholder and becomes as long as required by the data.
When you edit the spreadsheet in Excel, the placeholder will not reflect the current value of the source cell. In the example below, the source data is in A1, but as you can see the barcode placeholder is unaffected. Like most widgets, the barcode widgets are live in the converted web page, but not in Excel.
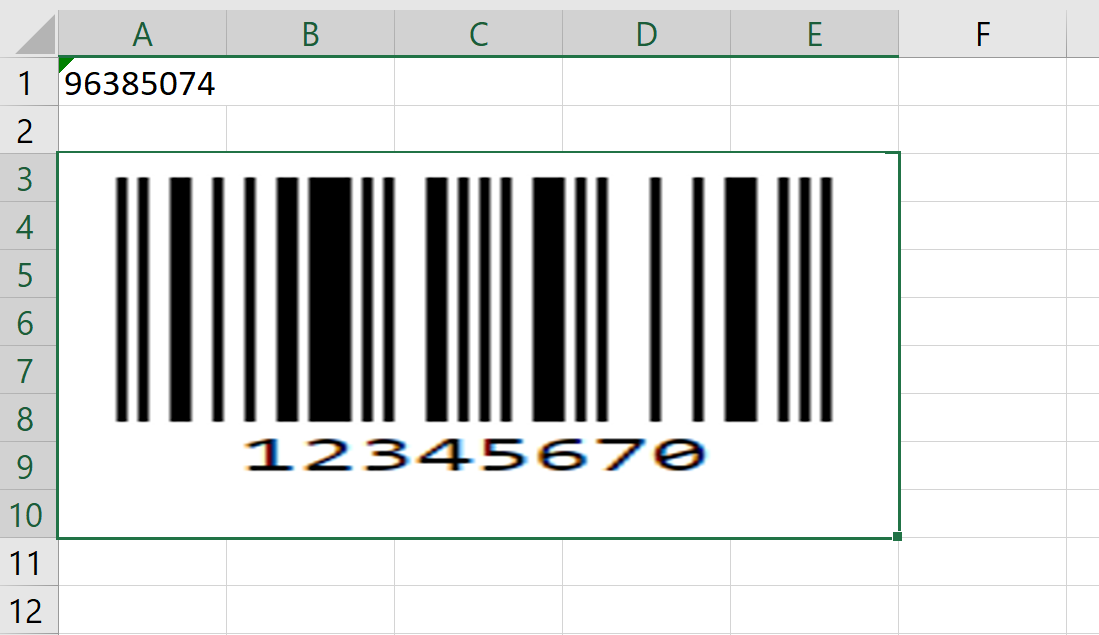
When you work with widgets that use placeholders, you will often get a better result if you merge all the cells behind the placeholder. This enables the converter to better determine the size of the widget as it will appear on the web page. In the example above, we have merged cells A3:E10 to make room for the widget.
The size of the placeholder in Excel is an approximation based on your settings for the barcode widget. The best way to change the size of the placeholder is to edit the settings. If you don’t think the placeholder has the correct size, you can drag the corners of the placeholder to adjust it. The size of the placeholder has no effect on the actual barcode on the web page.
Almost all barcodes contain extra information that helps detect scanning errors. Usually, there is a checksum that must validate against the rest of the field contents. This information is not part of the actual product, account or ticket number, which may contain its own checksum.
The checksum is only relevant during data entry, i.e. when the barcode is scanned or the corresponding numbers are manually typed into an input field. When saving the scanned product number you typically don’t save the checksum with it since it isn’t a part of the number.
The barcode widget does not validate any part of the code you provide. If the source data for a barcode is typed manually into a form, you must validate it before you use it to generate a barcode.
If the source data you assign to a barcode is incorrect, the barcode widget may generate a different number than you assign to it. We have no proper way to signal source data errors back to the form. Automatically correcting the data provided by your spreadsheet simplifies the coding of the spreadsheet and reduces errors.